To resolve Eureka vacuum troubleshooting issues, check for clogs, empty the dust cup, and clean the filters. Proper maintenance ensures optimal performance.
A well-maintained vacuum helps to keep your home clean and free of dust and allergens. Regular troubleshooting can prevent major breakdowns and extend the life of your Eureka vacuum. By following a few simple steps, you can easily address common issues and keep your vacuum running smoothly.
Let’s explore some common troubleshooting tips to help you address any problems you may encounter with your Eureka vacuum cleaner.
Introduction To Eureka Vacuum Troubleshooting
When your Eureka vacuum cleaner starts to act up, it can be frustrating, but don’t worry – troubleshooting common issues can often solve the problem without the need for professional repairs. In this guide, we’ll walk you through some common issues with Eureka vacuum cleaners and why quick fixes can be beneficial.
Common Issues With Vacuum Cleaners
Before diving into specific troubleshooting tips, it’s helpful to understand the common issues that can affect Eureka vacuum cleaners. These may include loss of suction, unusual noises, brush roll malfunctions, or difficulties with the power cord or attachments.
Why Quick Fixes Are Beneficial
Quick fixes for Eureka vacuum issues can save time and money, allowing you to get your vacuum back up and running without the need for professional assistance. By addressing common problems promptly, you can extend the lifespan of your vacuum and ensure it continues to perform effectively.
Identifying The Problem
To troubleshoot an Eureka vacuum, the first step is identifying the problem. Check the suction power, brush roll, and filters for any blockages or damages. Testing each component systematically can help pinpoint the issue and allow for effective repairs.
Initial Assessment Steps
Before diving into Eureka vacuum troubleshooting, it’s crucial to start by identifying the problem. Here are the initial assessment steps you can take to diagnose the issue:
- Check if the vacuum is plugged in properly.
- Inspect the power cord for any visible damage.
- Ensure the dust cup or bag is not full.
- Look for any blockages in the hose or brush roll.
When To Seek Professional Help
If after following the initial assessment steps, the problem persists, it might be time to seek professional help. Consider reaching out to a certified Eureka vacuum technician if:
- The vacuum motor is making unusual noises.
- The vacuum fails to turn on even after multiple attempts.
- There is a burning smell coming from the vacuum.
- Any electrical components appear damaged or faulty.
Loss Of Suction Power
Loss of suction power in your Eureka vacuum can be frustrating, impacting its cleaning performance. However, with some simple troubleshooting steps, you can often restore the suction power and get your vacuum working efficiently again.
Cleaning Or Replacing Filters
Cleaning or replacing filters is an essential maintenance task that can significantly impact the suction power of your Eureka vacuum. Over time, the filters can become clogged with dust, debris, and pet hair, leading to a reduction in suction. Refer to your vacuum’s user manual to locate the filters and follow the manufacturer’s instructions for cleaning or replacing them.
Checking For Clogs And Blockages
Checking for clogs and blockages is another crucial step in troubleshooting the loss of suction power in your Eureka vacuum. Start by inspecting the hose, brush roll, and other attachments for any obstructions that may be impeding airflow. Use a flashlight to carefully examine these areas, and remove any debris or blockages that you find. This simple step can often restore the suction power of your vacuum.
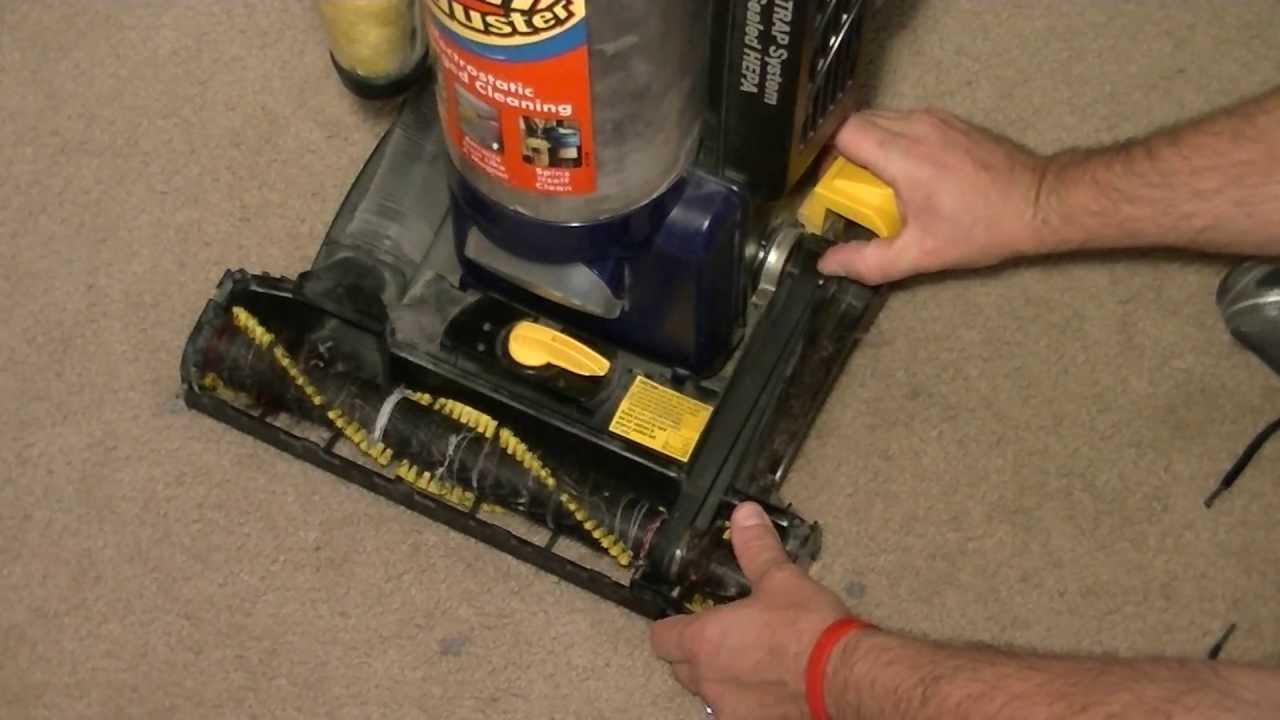
Brush-roll complications
Brush roll complications can lead to reduced suction and cleaning performance in your Eureka vacuum. It’s important to address any issues with the brush roll promptly to maintain the efficiency of your vacuum cleaner. Here are the steps to troubleshoot and resolve brush roll complications:
Unclogging The Brush Roll
If the brush roll is not spinning, it may be clogged with debris such as hair, thread, or other obstructions. Follow these simple steps to unclog the brush roll:
- Turn off the vacuum and unplug it from the power source.
- Locate the brush roll housing and remove it from the vacuum.
- Carefully remove any tangled hair or debris from the brush roll using scissors or a cleaning tool.
- Reassemble the brush roll housing and ensure it is securely in place.
- Plug in the vacuum and test the brush roll to ensure it spins freely.
Replacing A Worn Brush Roll
If the brush roll shows signs of wear or damage, it may need to be replaced. Follow these steps to replace the brush roll:
- Obtain a replacement brush roll compatible with your Eureka vacuum model.
- Turn off the vacuum and unplug it from the power source.
- Remove the brush roll housing from the vacuum.
- Unscrew or release the fasteners securing the brush roll in place.
- Remove the old brush roll and replace it with the new one.
- Secure the new brush roll in place and reassemble the brush roll housing.
- Plug in the vacuum and test the new brush roll for proper spinning and functionality.
Motor And Belt Issues
When it comes to troubleshooting your Eureka vacuum, motor and belt issues are common culprits that can disrupt the performance of your vacuum cleaner. Identifying the signs of a failing belt and knowing the steps to replace it can help you keep your Eureka vacuum running smoothly.
Signs Of A Failing Belt
If you notice unusual noises, such as squealing or grinding, coming from your vacuum, it could be a sign of a failing belt. Reduced suction power and the brush roll not turning while the vacuum is on are also indicators of a worn-out belt.
Steps To Replace The Belt
- Unplug the vacuum to ensure safety.
- Locate the brush roll and remove any screws or clips securing it in place.
- Slide the old belt off the brush roll and motor shaft.
- Install the new belt by placing it around the motor shaft and stretching it onto the brush roll.
- Reassemble the brush roll and any securing components.
- Plug in the vacuum and test the brush roll to ensure it is functioning properly.
Credit: m.youtube.com
Battery And Charging Concerns
When it comes to Eureka vacuum troubleshooting, one common area of concern is the battery and charging system. Cordless models, in particular, require special attention to ensure optimal performance and longevity. From identifying issues to maximizing battery life, let’s delve into the essential steps for troubleshooting and maintaining the battery and charging components of your Eureka vacuum.
Troubleshooting Cordless Models
If you encounter issues with your cordless Eureka vacuum, the first step is to assess the battery and charging system. Start by checking the power source and connections. Ensure that the charging dock or adapter is properly plugged in and that there are no visible signs of damage.
If the vacuum fails to charge, inspect the battery compartment for debris or corrosion. Clean the contacts using a dry cloth or a soft brush to remove any buildup that may impede the charging process. Additionally, verify that the battery is securely inserted and making proper contact with the terminals.
Maximizing Battery Life
To prolong the battery life of your Eureka cordless vacuum, it’s crucial to follow best practices for charging and usage. Avoid leaving the vacuum on the charger for extended periods after it reaches full capacity, as this can diminish the battery’s overall lifespan.
When storing the vacuum for an extended period, remove the battery and store it in a cool, dry place away from direct sunlight. This helps prevent degradation and maintains the battery’s performance over time.
Filter Maintenance For Optimal Performance
To ensure your Eureka vacuum operates at its best, regular filter maintenance is crucial. Clean filters lead to optimal performance and a longer lifespan for your vacuum cleaner. Make it a habit to clean or replace filters as needed for efficient cleaning results.
Filter Maintenance for Optimal Performance
Regular filter maintenance is crucial for keeping your Eureka vacuum running smoothly. Let’s dive into the key aspects of filter maintenance to ensure optimal performance.
Cleaning The Dust Cup Filter
To maintain optimal suction power, clean the dust cup filter regularly by rinsing it with water.
When To Replace Exhaust Filters
It’s time to replace exhaust filters when they appear dirty or every 3–6 months for peak performance.

Credit: www.ifixit.com
Addressing Strange Noises And Smells
When your Eureka vacuum starts emitting strange noises or unpleasant odors, it can be a cause for concern. Addressing these issues promptly can help maintain the efficiency and longevity of your vacuum. In this section, we will explore how to diagnose unusual sounds and eliminate unpleasant odors to ensure your Eureka vacuum operates smoothly and effectively.
Diagnosing Unusual Sounds
If your Eureka vacuum is producing unusual sounds, it’s essential to identify the source of the issue. Here are some common causes and troubleshooting steps:
- Loose or Clogged Components: Check for any loose or clogged parts within the vacuum, such as the brush roll, hose, or filters.
- Worn Belts or Bearings: Inspect the belts and bearings for signs of wear and tear, as these components can produce squealing or grinding noises when damaged.
- Foreign Objects: Remove any foreign objects or debris that may be causing the unusual sounds, particularly in the brush roll or hose.
Eliminating Unpleasant Odors
Unpleasant odors emanating from your Eureka vacuum can detract from the cleaning experience. Here’s how you can address and eliminate these odors:
- Clean or Replace Filters: Over time, the filters in your vacuum can become saturated with dust and debris, leading to unpleasant odors. Regularly clean or replace the filters according to the manufacturer’s recommendations.
- Empty Dust Bin or Bag: Ensure the dust bin or bag is emptied regularly to prevent the accumulation of odor-causing debris.
- Deodorizing Solutions: Utilize deodorizing solutions specifically designed for vacuums to neutralize odors and leave your Eureka vacuum smelling fresh.
Maintaining Your Eureka Vacuum
To troubleshoot your Eureka vacuum, start by checking the power cord for any damages and ensuring the filter and brush roll are clean. If the vacuum is still not working, inspect the belt and replace it if necessary. Regular maintenance will keep your Eureka vacuum running smoothly.
Regular Cleaning Routines
Regular cleaning of your Eureka vacuum is crucial for optimal performance. Use a damp cloth to wipe down the exterior of the vacuum. Empty the dust cup after each use to prevent clogs. Check the brush roll for any tangled hair or debris. Inspect the filters and clean or replace them as needed. Ensure all connections are secure to avoid loss of suction.
Storage Tips To Prevent Damage
Proper storage of your Eureka vacuum is essential for longevity. Store the vacuum in a dry and cool place to prevent mold growth. Avoid storing it near heat sources to prevent damage. Wrap the cord neatly to avoid tangles. Cover the vacuum to protect it from dust and dirt. Store accessories in a designated area to prevent loss.

Credit: www.ifixit.com
Professional Repair Vs. Diy
Opting between professional repair and DIY for Eureka vacuum troubleshooting depends on your skills and the issue’s complexity. Professional repair guarantees expertise, while DIY offers cost-saving but may lack efficiency. Consider your comfort level and the problem’s severity before deciding.
Evaluating The Cost Of Repair
Professional Repair
Professional repair of Eureka vacuum cleaners can be costly, depending on the extent of the damage and the model of the vacuum cleaner. Before deciding on professional repair, it’s important to consider the cost of repair versus the cost of a replacement vacuum cleaner. If the cost of repair is close to or exceeds the cost of a new vacuum cleaner, it may be more cost-effective to purchase a new one.
DIY Repair
DIY repair is a cost-effective alternative to professional repair. However, it’s important to evaluate the cost of DIY repair before attempting any repairs. The cost of DIY repair varies depending on the extent of the damage and the tools and parts required for repair. In some cases, DIY repair may require the purchase of specialized tools or parts, which can add to the cost.
Resources For DIY troubleshooting
Online Resources
There are several online resources available for DIY troubleshooting of Eureka vacuum cleaners. Eureka’s website offers a comprehensive troubleshooting guide that covers common issues and provides step-by-step instructions for resolving them. Other online resources include user forums and YouTube tutorials.
Owner’s Manual
The owner’s manual that comes with the Eureka vacuum cleaner is a valuable resource for DIY troubleshooting. It provides detailed information on the vacuum cleaner’s features, operation, and maintenance. The manual also includes a troubleshooting section that covers common issues and provides solutions.
Customer Service
Eureka’s customer service team is available to provide support and guidance for DIY troubleshooting. They can be reached by phone or email and can provide assistance with identifying the issue and determining the best course of action for repair.
In conclusion, evaluating the cost of repair versus the cost of a replacement vacuum cleaner is an important factor in deciding between professional repair and DIY repair. DIY repair can be a cost-effective alternative to professional repair, but it’s important to evaluate the cost of repair and the resources required for DIY repair before attempting any repairs. Utilizing online resources, the owner’s manual and customer service can provide valuable support and guidance for DIY troubleshooting.
Eureka Customer Support And Warranty
When facing issues with your Eureka vacuum, it’s crucial to know how to leverage the Eureka Customer Support and Warranty for quick resolution.
Using Your Warranty Service
Take advantage of the Eureka warranty service by referring to the terms outlined in your product documentation.
Contacting Customer Support For Assistance
If you require assistance, contact Eureka’s customer support for guidance on troubleshooting and potential solutions.
Conclusion: Ensuring Longevity Of Your Vacuum
To ensure the longevity of your Eureka vacuum, regular maintenance is key. Keep the filters clean and check for blockages in the hoses and brush rolls. Store the vacuum properly to prevent damage and extend its lifespan. Regular care will keep your Eureka vacuum running smoothly for years to come.
Key Takeaways From Troubleshooting
Eureka vacuum troubleshooting can extend the life of your vacuum.
Clean the filters regularly to maintain suction power.
Check for blockages in the hose to ensure optimal performance.
Final Thoughts On Vacuum Care
Proper maintenance is crucial for the longevity of your vacuum cleaner.
Regularly emptying the dust cup prevents clogs and maintains efficiency.
Store your vacuum in a dry place to prevent mold and mildew growth.
Frequently Asked Questions
Is There A Reset Button On An Eureka Vacuum?
Yes, Eureka vacuums have a reset button. It’s usually located on the motor housing. Press it to reset the vacuum if it stops working.
Why Is My Eureka Vacuum Not Suctioning?
Check the hose for clogs or tears. Clean or replace the filter. Ensure the brush roll is clear. Empty the dust cup. If problems persist, contact Eureka customer support for assistance.
How Do You Fix A Vacuum That Isn’t Suctioning?
To fix a vacuum that isn’t suctioning, check for clogs in the hose and filters. Clean or replace the filters and clear any blockages in the hose. Ensure the bag or canister isn’t full and inspect the brush roll for debris.
If the issue persists, consult a professional for further assistance.
Why Did My Vacuum Suddenly Stop Working?
Your vacuum may have stopped due to a clog in the hose or filter issues. Check these areas first.
How To Clean The Eureka Vacuum Filter?
To clean the Eureka vacuum filter, remove it and tap off excess debris. Wash it with water, and let it dry completely before reinserting.
Conclusion
To sum up, troubleshooting your Eureka vacuum can save you time and money from having to replace it. By following the steps outlined, you can easily identify and fix common issues with your vacuum. Remember to regularly maintain your vacuum to prevent future problems.
With these tips, you can keep your Eureka vacuum running smoothly for years to come.