If you are troubleshooting the Honeywell TH1110D2009 thermostat, check the display for error codes. In case of malfunctions, refer to the user manual for solutions.
The Honeywell TH1110D2009 thermostat provides precise temperature control for your home or office. It offers programmable settings to optimize energy efficiency while maintaining comfort. Understanding how to troubleshoot common issues ensures that your thermostat operates smoothly. By following simple steps, you can diagnose and resolve any problems that may arise with the device.
Let’s explore some troubleshooting techniques to help you get the most out of your Honeywell TH1110D2009 thermostat.

Credit: www.manua.ls
Introduction To Honeywell Th1110d2009
The Honeywell TH1110D2009 troubleshooting guide helps users resolve common issues with this thermostat model. From addressing connectivity problems to troubleshooting temperature discrepancies, this comprehensive resource assists users in resolving technical issues efficiently.
Honeywell TH1110D2009 is a reliable thermostat known for its efficient performance.
It offers precise temperature control, making it a popular choice for residential use.
Key Features Of The Thermostat
- Programmable settings for optimal comfort
- Clear digital display for easy readability
- Energy-saving mode to reduce costs
- Battery backup for uninterrupted operation
Importance Of Proper Maintenance
- Regular cleaning to ensure accurate readings
- Checking for software updates for improved functionality
- Calibrating the thermostat for precise temperature control
Credit: m.youtube.com
Common Issues And Initial Checks
When it comes to troubleshooting your Honeywell Th1110D2009 thermostat, there are several common issues and initial checks that you can perform to identify and potentially resolve the problem.
Power Supply Concerns
If your Honeywell Th1110D2009 thermostat is not turning on or is displaying a blank screen, the first thing to check is the power supply. Ensure that the thermostat is securely connected to the wall plate and that the wall plate is correctly wired to the power source. You may also want to check the circuit breaker or fuse box to ensure that power is being supplied to the thermostat.
Incorrect Settings
If the thermostat is turning on but not functioning properly, it may be due to incorrect settings. Check the thermostat settings to ensure that they are set correctly for your heating and cooling system. You may also want to check the temperature setting to ensure that it is set to the desired temperature.
Additionally, ensure that the thermostat is not in “hold” mode, which can override your settings and cause the thermostat to maintain a constant temperature.
Temperature Sensor Issues
If the thermostat is turning on and the settings are correct, but the temperature in the room does not match the temperature displayed on the thermostat, it may be due to a temperature sensor issue. Check that the temperature sensor is clean and free of debris, as a dirty sensor can cause inaccurate readings.
If the sensor is clean but still not functioning properly, it may need to be replaced. Contact a professional technician for assistance with replacing the sensor.
Wiring Problems
If the thermostat is turning on but the heating or cooling system is not functioning properly, it may be due to wiring problems. Check the wiring to ensure that it is correctly connected and securely fastened. You may also want to check for any damaged or frayed wires that may be causing the issue.
If you are unsure about how to check the wiring or identify any issues, contact a professional technician for assistance.
Troubleshooting Display Problems
Troubleshooting display problems with your Honeywell TH1110D2009 thermostat can help you quickly identify and resolve issues that may be affecting its performance. From blank screen issues to error codes, understanding how to troubleshoot display problems can save you time and money by avoiding unnecessary service calls. Let’s explore the common display problems and how to troubleshoot them effectively.
Blank Screen Issues
If your Honeywell TH1110D2009 thermostat is displaying a blank screen, there are a few potential causes and troubleshooting steps to consider.
- Check the power source and ensure the thermostat is receiving power. Verify that the wiring is properly connected and the circuit breaker is not tripped.
- Inspect the battery compartment for any corrosion or loose connections. Replace the batteries if necessary.
- Reset the thermostat by removing it from the wall plate for a few minutes, then reattach it to see if the display returns.
Error Codes And Their Meanings
Understanding the error codes displayed on your Honeywell TH1110D2009 thermostat can provide valuable insight into potential issues with the system.
| Error Code | Meaning |
|---|---|
| E1 | Indicates a communication error between the thermostat and the heating/cooling system. |
| E2 | Signals a loss of communication with the outdoor sensor, potentially affecting temperature readings. |
| E3 | Shows a fault with the temperature sensor, leading to inaccurate temperature readings. |
Refer to the thermostat’s manual for specific error code meanings and recommended troubleshooting steps for each code.
Solving Temperature Inaccuracies
When facing temperature inaccuracies with your Honeywell TH1110D2009 thermostat, it’s essential to troubleshoot and address the issues promptly to ensure optimal performance. Solving temperature inaccuracies involves calibration techniques and sensor positioning to guarantee precise temperature readings.
Calibration Techniques
Calibration is a key aspect of resolving temperature inaccuracies with the Honeywell TH1110D2009 thermostat. To calibrate the device, follow these steps:
- Access the calibration menu on the thermostat.
- Adjust the temperature setting to match a reliable thermometer.
- Verify the accuracy of the temperature readings after calibration.
Sensor Positioning
Proper sensor positioning is crucial for accurate temperature readings. Ensure that:
- The thermostat is not exposed to direct sunlight or drafts.
- The sensor is not obstructed by furniture or curtains.
- The thermostat is installed away from heat sources or cold spots.
Connectivity Challenges
Wi-fi Connection Problems
One of the common issues faced with the Honeywell TH1110D2009 thermostat is related to Wi-Fi connection problems. When the thermostat fails to connect to the Wi-Fi network, it can hinder remote access and control capabilities, impacting the overall user experience.
Troubleshooting Remote Access
When troubleshooting remote access issues with the Honeywell TH1110D2009 thermostat, it’s essential to start by ensuring that the device is properly connected to the Wi-Fi network. Additionally, verifying the compatibility of the network with the thermostat’s requirements is crucial for seamless remote access.
Battery Issues And Replacement
Batteries are crucial components of the Honeywell TH1110D2009 thermostat, providing power for its operation. However, like any electronic device, the thermostat may encounter battery-related issues, necessitating timely troubleshooting and replacement. Understanding when to replace the batteries and the proper steps for doing so is essential for maintaining the functionality of your thermostat.
When To Replace Your Batteries
Regularly assessing the battery status of your Honeywell TH1110D2009 thermostat is imperative to prevent any disruptions in its operation. When the low battery indicator appears on the display, it’s time to replace the batteries. Additionally, if the thermostat becomes unresponsive or if the screen fades, it could indicate low battery levels, prompting the need for replacement.
Steps For Proper Battery Replacement
Follow these simple steps to ensure a seamless battery replacement process for your Honeywell TH1110D2009 thermostat:
- Turn off the thermostat by switching it to the off position.
- Carefully remove the battery compartment cover, typically located at the bottom of the device.
- Take out the old batteries, ensuring proper disposal in accordance with local regulations.
- Insert new AA alkaline batteries, observing the correct polarity.
- Replace the battery compartment cover securely.
- Power on the thermostat and verify that the display is functioning properly.
Resetting The Honeywell Th1110d2009
To troubleshoot the Honeywell TH1110D2009, reset the thermostat by pressing the “Run” button for five seconds. This helps resolve common issues like unresponsive controls or incorrect temperature readings.
Resetting the Honeywell TH1110D2009 is essential if you encounter any issues with your thermostat. It is a simple process that you can easily do yourself. In this post, we will focus on the step-by-step reset process for the Honeywell TH1110D2009, so you can have your thermostat up and running in no time.When To Reset Your Thermostat
Before we dive into the reset process, let’s first determine when you need to reset your thermostat. You might need to reset your Honeywell TH1110D2009 if:- Your thermostat is not responding.
- Your thermostat is not displaying the correct temperature.
- Your thermostat is not turning on or off your HVAC system.
- Your thermostat is not following your programmed schedule.
Step-by-step Reset Process
To reset your Honeywell TH1110D2009, follow these simple steps:- Press the “System” button on your thermostat.
- Press and hold the “Fan” button and the “Up” arrow button at the same time.
- Release both buttons when the screen changes.
- Press the “Down” arrow button until you see “RESET” on the screen.
- Press the “Select” button to confirm the reset.

Credit: m.youtube.com
Professional Help And Support
When To Call A Professional
If you encounter complex issues with your Honeywell TH1110D2009 thermostat, contact a certified technician.
Warranty And Service Information
For warranty details and service support, refer to the manufacturer’s guidelines or contact Honeywell directly.
Frequently Asked Questions
Why Is My Honeywell Thermostat Not Working Properly?
Check if the thermostat is set correctly, replace batteries, ensure proper wiring, and clean any debris affecting functionality.
How To Do A Hard Reset On Honeywell?
To perform a hard reset on a Honeywell device, press and hold the reset button for 15 seconds.
Why Is My Honeywell Thermostat Not Communicating?
Check if the thermostat is properly connected to the Wi-Fi network. Update the software and troubleshoot any wiring issues.
How Do You Know When Your Honeywell Thermostat Is Going Bad?
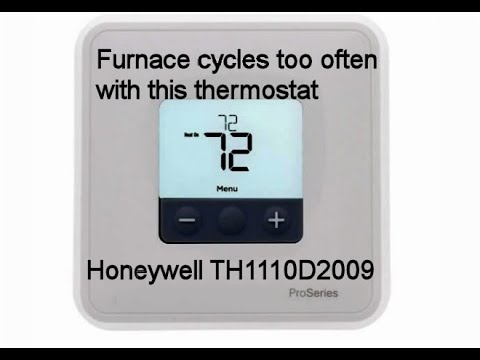
Signs of a failing Honeywell thermostat include inaccurate temperature readings, unresponsive controls, and frequent system cycling. If you notice these issues, it may be time to consider replacing your thermostat. Regular maintenance and professional inspection can help identify potential problems early on.
How Do I Reset The Honeywell Th1110d2009 Thermostat?
To reset the Honeywell TH1110D2009 thermostat, press the “SET” button and use the arrow keys to adjust the settings.
Conclusion
To troubleshoot the Honeywell TH1110D2009, follow these steps to diagnose and resolve common issues efficiently. By understanding the thermostat’s functions and potential problems, you can ensure optimal performance and comfort in your home. Stay informed and proactive to maintain a well-functioning HVAC system.