To charge an RV battery with a generator, connect the generator to the RV’s power inlet and start the generator. Ensure the generator runs long enough to fully charge the battery.
Charging an RV battery with a generator is essential for maintaining battery health and ensuring reliable power during trips. The process involves connecting the generator to the RV’s power inlet, allowing it to transfer power efficiently. This method is particularly useful when you’re off-grid or in remote locations without access to shore power.
Proper charging ensures that your RV battery remains in optimal condition, providing energy for essential appliances and systems. It’s important to follow safety guidelines and manufacturer instructions to avoid overcharging or damaging the battery. Regular maintenance and monitoring can extend the battery’s lifespan and enhance your RV experience.
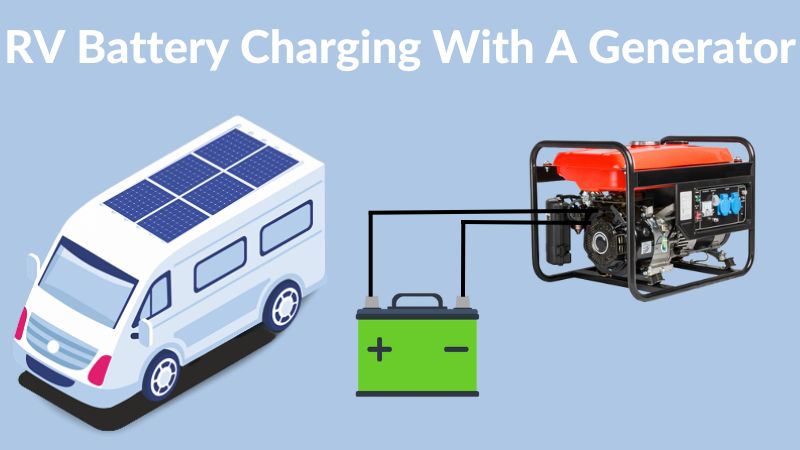
Credit: www.electronicshub.org
Safety Precautions
Charging your RV battery with a generator is easy. However, you must follow safety precautions. These steps will help you stay safe and protect your equipment.
Wear Protective Gear
Always wear protective gear while working with batteries. Safety goggles protect your eyes from splashes. Gloves shield your hands from acid burns. Long sleeves and pants keep your skin covered. This gear helps prevent injuries.
Ensure Proper Ventilation
Generators produce harmful fumes. Ensure proper ventilation to avoid inhaling these fumes. Place the generator outside or in a well-ventilated area. This keeps the air clean and safe to breathe. Never run the generator in an enclosed space.
Here is a simple table to remember these points:
| Safety Measure | Reason |
|---|---|
| Wear Safety Goggles | Protects eyes from battery acid |
| Wear Gloves | Prevents acid burns on hands |
| Ensure Ventilation | Avoids inhaling harmful fumes |
Follow these steps to ensure your safety while charging the RV battery. These safety measures protect you and your equipment.

Credit: shopsolarkits.com
Gather Necessary Equipment
Charging your RV battery with a generator requires careful preparation. The first step is to gather the necessary equipment. This will ensure a smooth and efficient charging process.
Required Tools
- Generator: A portable generator suitable for RV use.
- Battery Charger: A compatible battery charger for your RV.
- Extension Cords: Heavy-duty extension cords to reach your RV battery.
- Multimeter: To measure battery voltage and ensure proper charging.
- Safety Gear: Gloves and safety glasses for protection.
Choosing The Right Generator
Selecting the right generator is crucial. It must have enough power to charge your RV battery. Consider these factors:
| Feature | Recommendation |
|---|---|
| Wattage | At least 2000 watts |
| Portability | Lightweight and easy to transport |
| Fuel Type | Gasoline, diesel, or propane |
| Noise Level | Quiet operation (under 60 dB) |
| Safety Features | Automatic shut-off, overload protection |
Make sure your generator has enough outlets. It should handle your RV’s electrical needs.
Prepare The Generator
Before charging your RV battery with a generator, you must prepare the generator. This ensures everything runs smoothly and safely. Follow these steps to get your generator ready for use.
Check Fuel Levels
First, check the fuel levels in your generator. A generator with low fuel can’t run properly. Make sure the fuel tank is full. Use the right type of fuel as specified by the manufacturer. Keeping the fuel levels adequate prevents interruptions during the charging process.
Inspect For Damage
Next, inspect the generator for any visible damage. Look for cracks, loose parts, or oil leaks. Ensure all components are securely attached. A damaged generator can be unsafe and might not work well. Conduct a thorough visual inspection before starting.
| Inspection Points | What to Look For |
|---|---|
| Fuel Tank | Check for cracks and leaks |
| Oil Levels | Ensure oil is at the right level |
| Electrical Connections | Look for loose or frayed wires |
By following these steps, your generator will be ready to charge your RV battery efficiently and safely.
Connect The Generator To Rv Battery
Connecting your generator to your RV battery is crucial for charging. Follow these steps to ensure a safe and effective connection.
Locate Battery Terminals
First, locate the battery terminals on your RV. They are usually near the front or side.
Positive and negative terminals are marked with + and – signs. Identifying these is essential for a correct connection.
Attach Cables Correctly
Next, ensure the generator is off before attaching cables. This step is crucial for safety.
Attach the positive cable to the positive terminal. Secure it tightly to avoid loose connections.
Then, attach the negative cable to the negative terminal. This prevents any power issues.
Use the table below to summarize the steps:
| Step | Action |
|---|---|
| 1 | Turn off the generator |
| 2 | Locate battery terminals on RV |
| 3 | Attach positive cable to positive terminal |
| 4 | Attach negative cable to negative terminal |
Start The Charging Process
Before beginning the charging process, ensure you have all necessary equipment. This includes your generator, RV battery, and appropriate cables. Proper preparation ensures a smooth and safe charging process.
Power On The Generator
Locate your generator in a well-ventilated area. This prevents dangerous fume build-up. Follow the manufacturer’s instructions to start the generator. Ensure it runs smoothly before connecting to the RV battery.
Use the correct cables to connect the generator to the RV battery. Ensure all connections are secure. Loose connections can cause sparks or improper charging.
| Step | Description |
|---|---|
| 1 | Place generator in a ventilated area. |
| 2 | Start the generator. |
| 3 | Connect cables securely. |
Monitor Charging Progress
Once the generator is running, keep an eye on the charging process. Most generators have a display panel. This panel shows the charging status and battery level.
- Check the display panel regularly.
- Ensure the battery is charging properly.
- Watch for any error messages.
Disconnect the generator once the battery is fully charged. Turn off the generator and carefully remove the cables. Store your equipment safely for future use.
Credit: rvlife.com
Monitor And Maintain
Properly monitoring and maintaining your RV battery is crucial. This ensures its longevity and efficiency. Regular checks and adjustments can prevent unexpected issues. This section will guide you through essential steps to keep your battery in top shape.
Check Battery Levels
Regularly check the battery levels. Use a voltmeter to measure the charge. A fully charged battery should read between 12.6 and 12.8 volts. If the reading is below 12.4 volts, it’s time to charge.
Here’s a simple table to help you:
| Battery Voltage | Charge Level |
|---|---|
| 12.6 – 12.8 | Full |
| 12.4 – 12.6 | 75% – 100% |
| 12.2 – 12.4 | 50% – 75% |
| 12.0 – 12.2 | 25% – 50% |
| Below 12.0 | 0% – 25% |
Adjust Charging Rate
Adjust the charging rate based on the battery level. A lower battery level requires a higher charging rate. But overcharging can damage the battery. Use a smart charger to avoid this issue.
Follow these steps to adjust the charging rate:
- Check the current battery voltage.
- Set the charger to the appropriate rate.
- Monitor the voltage during charging.
- Reduce the rate as the battery nears full charge.
Avoid charging a fully charged battery. This can lead to overheating and damage.
Troubleshooting Common Issues
Charging your RV battery with a generator can sometimes present challenges. Knowing how to troubleshoot these common issues ensures your battery charges efficiently.
Generator Fails To Start
If your generator fails to start, it could be due to several reasons:
- Fuel Level: Check if the generator has enough fuel.
- Oil Level: Ensure the oil level is adequate. Many generators have a low-oil sensor that prevents starting.
- Spark Plug: Inspect the spark plug for dirt or damage. Clean or replace if necessary.
- Battery: If your generator has a battery start, make sure the battery is charged.
These steps often resolve starting issues.
Battery Not Charging
If your RV battery is not charging, consider these potential issues:
- Connections: Ensure all cables are securely connected. Loose cables can interrupt charging.
- Generator Output: Verify that the generator is producing the right voltage output. Use a multimeter to check this.
- Inverter/Charger: Inspect the inverter or charger for faults. These components must be working correctly for the battery to charge.
- Battery Condition: Test the battery’s health. Sometimes, a battery may be too old or damaged to charge.
Use these tips to identify and fix charging problems effectively.
Frequently Asked Questions
How Long To Charge Rv Battery With Generator?
Charging time depends on battery type and generator power, typically 2-4 hours for a full charge.
Can You Overcharge Rv Battery With Generator?
Yes, overcharging can damage the battery. Use a smart charger to prevent overcharging.
Is It Safe To Charge Rv Battery Overnight?
Charging overnight is generally safe with a smart charger, but always monitor battery status to avoid issues.
What Generator Size To Charge Rv Battery?
A generator with at least 2,000 watts is recommended for efficiently charging RV batteries.
How To Connect Generator To Rv Battery?
Use proper cables to connect the generator to the RV’s battery terminals, ensuring correct polarity.
Does Generator Charge Rv Battery While Driving?
No, generators typically don’t charge RV batteries while driving. The alternator usually handles that task.
Conclusion
Charging your RV battery with a generator is simple and efficient. Follow the steps mentioned for a reliable power source. Regular maintenance of both the generator and battery ensures longevity. Always prioritize safety and consult your RV’s manual for specific instructions.
Enjoy your travels with a fully charged RV battery!